
HEART GARLAND
What you’ll need:
- 6 assorted fat flats
- Offray DFS mini dot 3mm ribbon, shock pink
- Crafters choice stuffing
- Optional – dried lavender or potpourri
- Matching Gutermann 100% cotton thread
- Pins, tape measure
- Fabric marker or pencil
- Scissors, seam ripper
- Hand sewing needle
- Sewing machine
- Heart template (can be downloaded from spotlightstores.com)
Instructions:
- Press flat fat and using the template provided trace 10 hearts onto the wrong side. Carefully cut out the hearts.
- Cut a 15cm length of ribbon and fold it in half with cut ends together to form a loop. With the right side of one heart facing, pin the ends of the ribbon to the top raw edge of the heart with raw edges aligned. This means the ribbon loop will be on top of the fabric and inside the heart for sewing.
- Place another heart on top with the right sides together. Pin hearts around the edge leaving a 4cm opening on one side.
- Using a 6mm seam allowance, sew around the edge of each heart leaving a 4cm opening on one side. Press. Trim the point and clip into the top edge. Turn right side out and press.
- Gently stuff the heart adding lavender or potpourri if desired.
- Hand sew opening closed. Repeat to make as many hearts as you like.
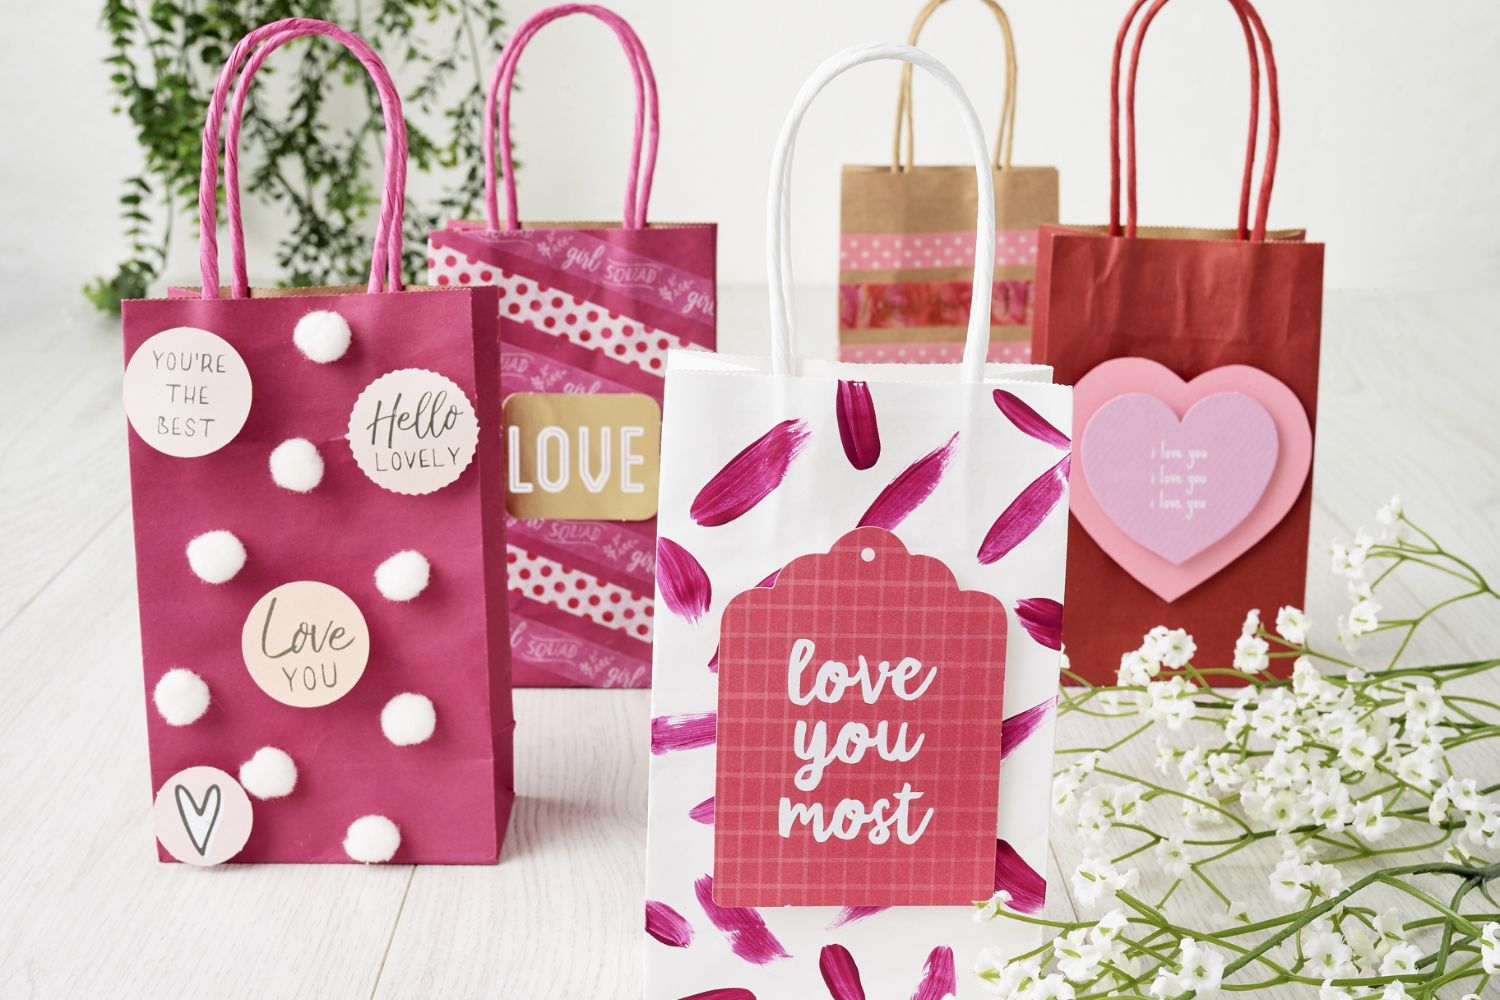
GIFT BAGS
What you’ll need:
- Paper gift bags (red, pink, white, or craft)
- Acrylic paint
- Medium paint brush
- Water for cleaning paintbrushes
- Hot glue gun and glue sticks
- Double-sided tape and foam tape
- Scissors
- Pompoms
- Paper pads and plain card stock
Instructions:
- Open up your paper bags so they can stand upright.
- Lay out all your materials so you can see everything you have to decorate your bags with.
- Use the paintbrush to paint brush strokes to decorate a bag. This doesn’t need to be perfect, the natural brush stroke looks nice by itself or you can paint a particular design if you like. Be careful not to use too much paint as the paper bag may soften. Allow to dry.
- Turn on the hot glue gun and glue pompoms onto a bag in a random pattern or again you can glue a particular design such as a love heart of the first letter of your valentine’s name.
- Lastly, cut out various paper shapes or letters using scissors and stick them onto bags using either double-sided tape or foam tape if you would like to create a 3D effect on your bags.
- Once you’ve finished your bags, filled with goodies and give them to loved ones!

CROCHET ENVELOPE
What you’ll need:
- ‘Value ball’ Stash 8 ply 50g balls, 2 colours per envelope
- 5mm crochet hook
- Scissors, yarn needle, tape measure
Finished measurements:
- Small 11.5 x 11.5 cm
- Large 13 x 13cm
Tension:
Tension is not essential for this pattern. Chain 30 (36) using a 4.5mm crochet hook. 1st row – DC into second ch from hook and in each stitch across 29 (35) sts, turn 2nd row – Ch 1, dc into every st across. Continue in this way until the work is a square shape.
Instructions:
- Small Envelope: Starting at the flap corner DC around all 4 edges of the square in a contrasting colour, with 1dc, 1ch, 1dc in each corner st. Fold the work so 3 corners meet in the middle and sc the 2 seams in the original colour.
- Large Envelope: Fold so 3 corners meet in the middle. Sew the 2 seams using the same colour yarn. Using a contrast colour slip st around the flap of the envelope.
- Finishing: Do not press. Work in all loose ends and insert a personalised Valentine’s card.


